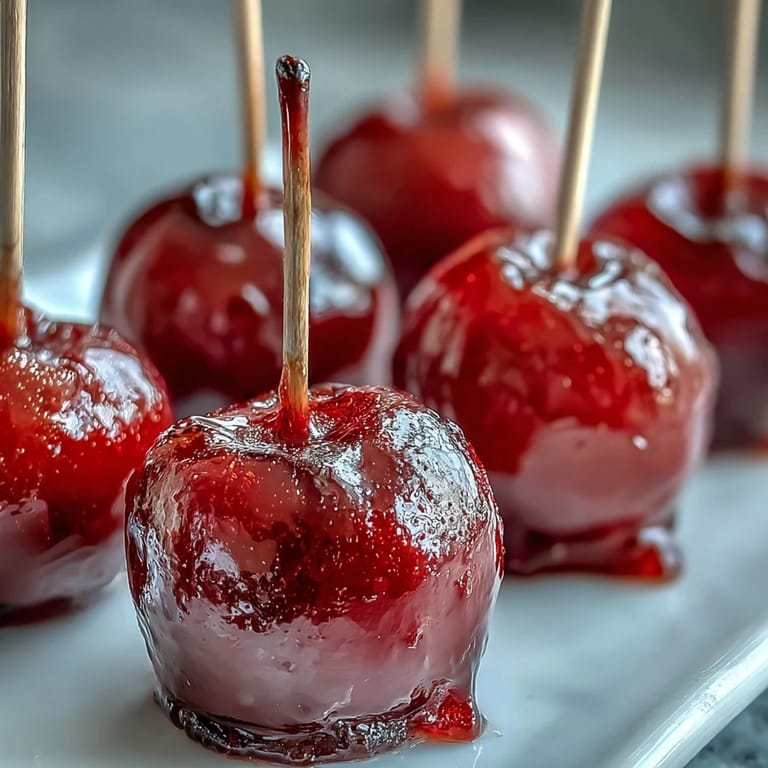
 Pin it
 My daughter came home from school with a permission slip for the fall festival, and the only thing she could talk about was the candy apple stand. She described them with such wonder—the glossy red shells, the way they caught the light—that I decided we'd make our own version at home. Standing in the kitchen with her that Saturday afternoon, watching her eyes light up as we dipped the first apple into that molten candy syrup, I realized this wasn't just about recreating a carnival treat. It was about creating something she'd remember.
I made a batch for my niece's fifth birthday party, and honestly, those candy apples disappeared faster than anything else on the dessert table. One kid asked if we could make them every single week, which gave me unrealistic expectations about my own commitment to candy-making. But that moment of pure joy when she bit through the shiny shell and tasted the tartness of the apple underneath? That's why I keep coming back to this recipe.
Ingredients
- 8 small apples (Gala or Fuji), or 16 crabapples: The smaller the apple, the more manageable they are for little hands, and crabapples are naturally petite and tart, which plays beautifully against the sweet candy coating.
- 2 cups granulated sugar: This is your foundation for that glassy, crisp shell that shatters between your teeth.
- ½ cup light corn syrup: Don't skip this—it prevents crystallization and gives the candy that professional shine you see at the fair.
- ½ cup water: This dissolves the sugar evenly and helps you reach that perfect hard-crack stage without burning.
- ½ teaspoon red gel food coloring: Gel colors are more concentrated than liquid, so you get that brilliant red without watering down your candy mixture.
- 16 wooden sticks: Make sure they're food-safe and sturdy enough not to splinter when you're holding them in the hot syrup.
- Nonstick cooking spray or parchment paper: This prevents the finished apples from bonding permanently to your baking sheet like they've taken up residence.
Tired of Takeout? 🥡
Get 10 meals you can make faster than delivery arrives. Seriously.
One email. No spam. Unsubscribe anytime.
Instructions
- Prep your apples with care:
- Wash each apple thoroughly under cool water and dry them completely with a kitchen towel—any moisture will cause the hot candy to seize up. If you're using larger apples, cut them in half, scoop out the seeds with a melon baller, and push a wooden stick firmly into the flat cut end or the stem; the stick needs to be your anchor when things get hot.
- Set up your workspace:
- Line your baking sheet with parchment paper or use a silicone mat, then give it a light spray of nonstick cooking spray. Having everything ready before you start the candy means you won't be frantically searching for supplies while your syrup is at the perfect temperature.
- Build your candy base:
- Combine the sugar, corn syrup, and water in a medium saucepan and stir over medium heat until the sugar dissolves completely—you shouldn't see any grainy texture at the bottom. Once the mixture looks clear and smooth, stop stirring; this is the moment you stop interfering and let the heat do its work.
- Reach hard-crack stage:
- Increase the heat to high and let the mixture bubble away without stirring—stirring will introduce crystals that will ruin that beautiful glossy finish. Watch your candy thermometer like a hawk until it hits 290°F, which should take about 8 to 10 minutes; at this temperature, the candy will be hard and crunchy when it cools, not chewy.
- Add your color moment:
- Remove the saucepan from the heat and carefully stir in the red gel food coloring until it's completely even throughout. Work quickly but carefully here; the syrup is dangerously hot, and you want the color distributed before you start dipping.
- Dip with confidence:
- Hold each apple by its stick and dip it into the hot candy coating with a smooth, swirling motion to coat all sides evenly. Let the excess drip off for just a second, then place it on your prepared baking sheet and step back; the candy will continue to coat and set as it cools.
- The hardest part—waiting:
- Leave your apples alone at room temperature for about 10 minutes while the coating hardens into that snappy, crunchy shell. This is when you might be tempted to poke at them, but resist; they need this time to set properly.
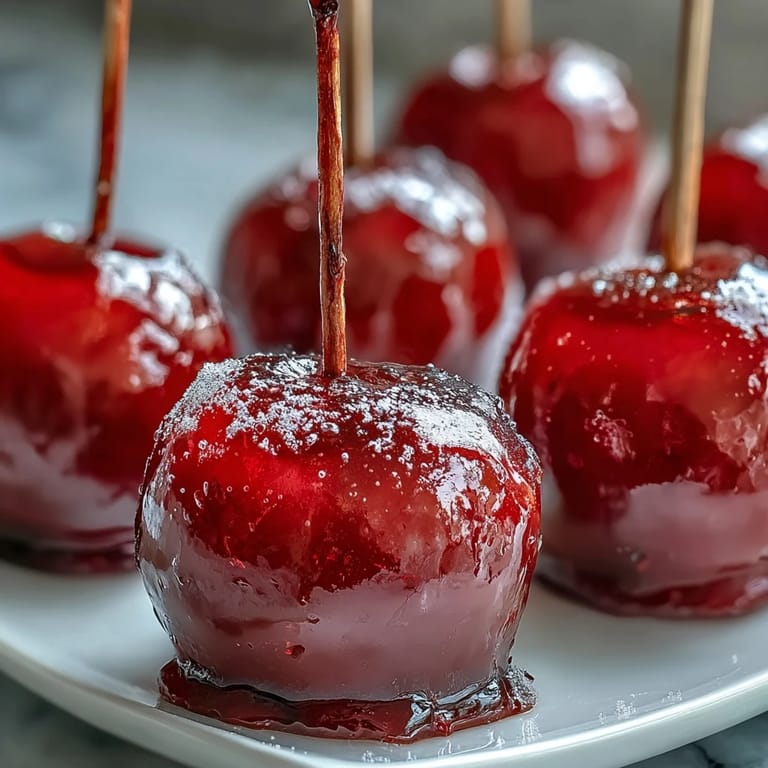 Pin it
 There's something genuinely special about biting into a candy apple—that first moment when your teeth break through the shell and you hear the satisfying crunch, followed by the tartness of the fresh fruit underneath. My nephew kept asking to make them again and again that fall, until candy apples became less of a recipe and more of a tradition we didn't know we were starting.
The Secret to a Shiny Finish
The glossiness everyone admires isn't magic—it's all about the corn syrup and the temperature. Corn syrup prevents sugar crystals from forming, which means your candy stays smooth and clear rather than turning grainy and matte. I've experimented with leaving out the corn syrup to save a few cents, and the difference is immediately obvious. The coating looked dull and felt gritty instead of that clean, glassy snap. Now I always keep a bottle on hand, because that shine is part of the whole appeal.
Customizing Your Apples
The basic red is classic, but the moment you realize you can use any gel food coloring, your options explode. I've made emerald green ones for Halloween, deep purple ones for a more sophisticated crowd, and even pastel pink for a baby shower. The real fun happens when you dip the freshly coated apples into decorative toppings before the shell hardens—sprinkles, crushed candy canes, mini chocolate chips, or even finely chopped cookies all stick beautifully when the coating is still slightly tacky.
- Dip into your chosen topping immediately after coating, while the candy is still sticky enough to grab hold.
- Use gel coloring instead of liquid to avoid diluting your syrup and throwing off your cooking temperature.
- Green, blue, and purple are stunning alternatives if you want to break from the traditional bright red.
Storage and Handling
Once your apples have cooled completely, store them at room temperature in an airtight container, where they'll stay crisp and delicious for several days. Whatever you do, don't refrigerate them—I learned this the hard way when I thought cold storage would preserve them longer, only to find the candy coating had turned sticky and tacky within hours. The cold creates condensation on the shell, and moisture is the enemy of hard candy.
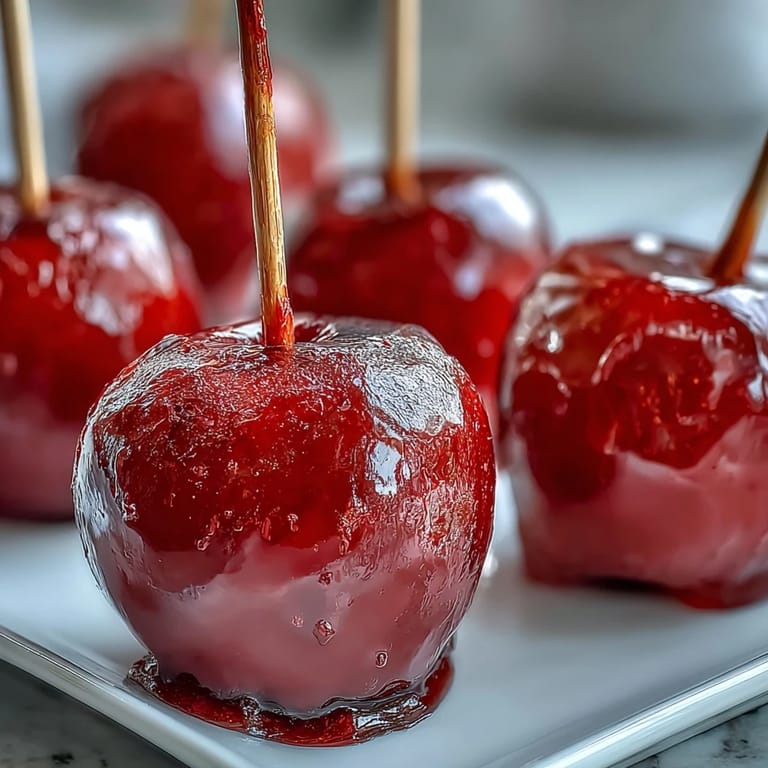 Pin it
 Making candy apples is one of those simple pleasures that reminds you why cooking for people you love matters. The joy of creating something beautiful and delicious, even if it's just a glossy red apple on a stick, never gets old.
Recipe FAQs
- → What type of apples work best?
Small apples like Gala, Fuji, or crabapples are ideal, as their size suits bite-sized treats perfectly.
- → How to achieve the shiny candy shell?
Boil the sugar, corn syrup, and water mixture to 290°F (hard crack stage) before dipping the apples for a glossy, crisp coating.
- → Can I use different colors for the coating?
Yes, you can substitute the red gel food coloring with green, blue, or other gel colors for a custom look.
- → How should I prepare the apples before coating?
Wash and dry them thoroughly. For larger apples, cut in halves and remove seeds, then firmly insert wooden sticks.
- → Any tips for adding extra decorations?
Dip freshly coated apples into sprinkles, crushed cookies, or mini chocolate chips before the candy shell hardens.