 Pin it
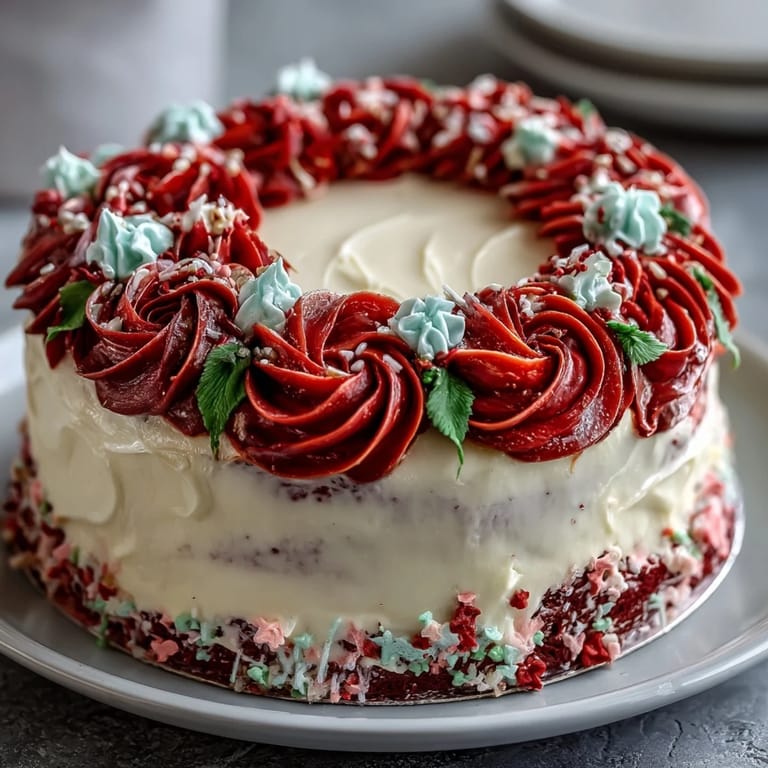
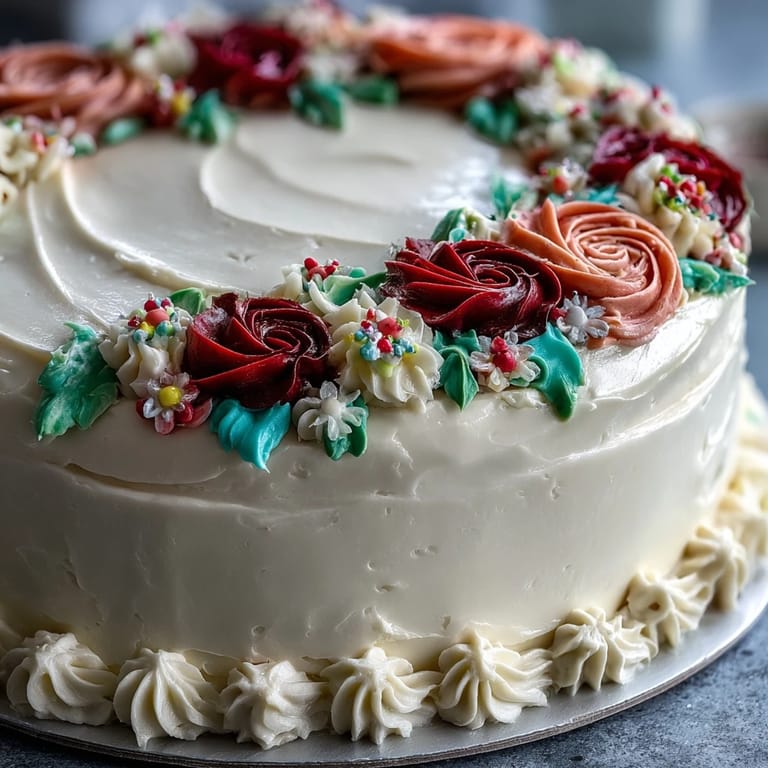
 My friend Sarah texted me three days before her graduation asking if I could make her a cake, and honestly, I almost said no until she added one detail: she wanted it to look fancy enough to make her parents cry. That's when I knew this sheet cake with buttercream roses had to happen. There's something about piping those delicate flowers that transforms a simple vanilla cake into an actual celebration on a platter. The soft, moist layers hidden underneath felt like a secret only we'd know about while everyone admired the roses. I'd never attempted anything this decorative before, so I was nervous, but something about making it for her made the whole thing feel possible.
I'll never forget the moment Sarah walked into her own party and saw that cake sitting on the dessert table with 'Congratulations' piped across it in her class colors. Her mom actually took a photo before anyone cut into it, which made me laugh because let's be honest, nobody does that unless it actually looks beautiful. What made me proudest wasn't even the roses though—it was hearing her say later that she'd saved a slice in her freezer because it reminded her of that specific afternoon when everything felt like it was finally coming together.
Ingredients
- All-purpose flour (3 cups): This is your cake's backbone, and measuring by weight instead of volume actually matters here because it prevents that dense, sunken cake situation I learned about the hard way.
- Baking powder and baking soda (2½ tsp and ½ tsp): These two work together to give you that light, tender crumb that doesn't feel like a brick.
- Unsalted butter for cake (1 cup, room temperature): Room temperature is non-negotiable because cold butter won't cream properly, and creaming is where the magic happens.
- Granulated sugar (2 cups): This sweetens and aerates the batter when beaten with butter, creating those tiny air pockets that make the cake fluffy.
- Eggs (4 large, room temperature): Cold eggs won't incorporate smoothly, so pull them out of the fridge at least thirty minutes before you start mixing.
- Vanilla extract (1 tbsp): Use the real stuff if you can because it makes a noticeable difference in flavor compared to imitation.
- Whole milk (1¼ cups, room temperature): The room temperature milk helps everything blend together without shocking the batter with cold temperature.
- Unsalted butter for buttercream (1½ cups, room temperature): This needs to be soft enough that your finger leaves a dent, otherwise you'll be beating it forever and it'll split.
- Powdered sugar (6 cups, sifted): Sifting removes lumps and makes the frosting silky instead of grainy, which absolutely matters when you're piping roses.
- Gel food coloring (assorted colors): Gel is worth seeking out because it doesn't thin out your buttercream like liquid coloring does, and the colors are so much more vibrant.
Tired of Takeout? 🥡
Get 10 meals you can make faster than delivery arrives. Seriously.
One email. No spam. Unsubscribe anytime.
Instructions
- Set up your station and preheat:
- Get your oven running at 350°F and prep that 12x18-inch pan by greasing it thoroughly and lining it with parchment paper—the paper is the difference between a cake that slides out easily and one that rips apart. While the oven heats, gather everything you'll need because once you start mixing, things move fast.
- Combine your dry ingredients:
- Whisk together the flour, baking powder, baking soda, and salt in a medium bowl until they're evenly distributed. This mixing step prevents those pockets of baking soda that would taste bitter and metallic in your finished cake.
- Cream butter and sugar until fluffy:
- Beat the softened butter and sugar together for about three to four minutes until the mixture looks pale and almost cloud-like. You'll know it's ready when it doubles in volume and no longer feels gritty between your fingers.
- Add eggs and vanilla carefully:
- Drop in one egg at a time, beating after each addition so it fully incorporates before the next one goes in. Once all the eggs are in, add the vanilla and beat it smooth.
- Alternate wet and dry ingredients:
- Start with some of the flour mixture, then add some milk, then more flour, always ending with flour to keep the batter from being too loose. Stir just until you don't see dry streaks anymore because overmixing at this stage toughens the cake.
- Bake until golden and set:
- Pour the batter into your prepared pan, smooth the top gently with an offset spatula, and slide it into the oven. Bake for thirty to thirty-five minutes until the top is light golden and a toothpick poked into the center comes out clean, then let it cool completely in the pan.
- Make the buttercream base:
- Beat the softened butter on its own for a minute until it's creamy, then gradually add the sifted powdered sugar a cup at a time. Once it gets thick and pale, add the milk and vanilla, then beat for about five minutes until it's fluffy and spreadable.
- Divide and tint your frosting:
- Spoon portions of buttercream into separate bowls and add gel coloring drop by drop, stirring until you get the shade you want. Keep some white buttercream in the original bowl for your base layer.
- Spread a smooth base layer:
- Pipe or spread that white buttercream all over the cooled cake, creating an even, crumb-free surface for the roses to sit on. This base layer is what makes the final cake look polished rather than patchy.
- Pipe your roses and leaves:
- Fit piping bags with a petal tip for the roses and a leaf tip for greenery, then pipe them across the cake focusing on the corners or creating a border. Start with the larger roses and fill in gaps with smaller buds and leaves for a fuller, more garden-like look.
- Add your message:
- Switch to a small round piping tip, load it with white or contrasting colored frosting, and carefully pipe 'Congratulations' or whatever message you're celebrating. Write lightly on a less visible spot first if you're nervous, because corrections on buttercream aren't always clean.
 Pin it
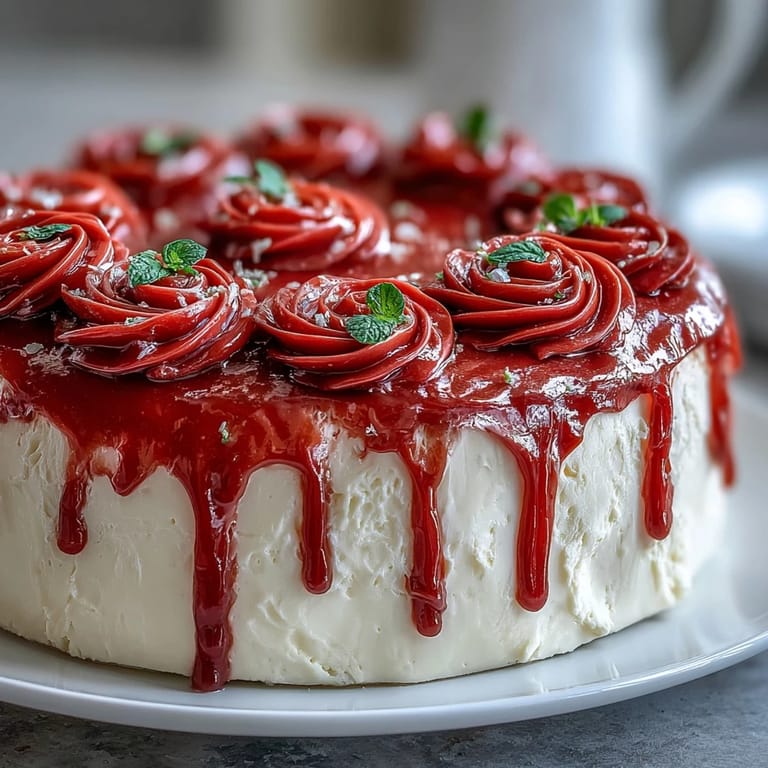
 There's a moment right after you pipe the last rose when you step back and realize you actually made this beautiful thing, and the nervousness you felt an hour earlier just melts away. That's when this cake becomes more than just dessert—it becomes proof that you showed up for someone on a day that mattered to them.
Decorating Like You Know What You're Doing
The secret to piping roses that don't look completely tragic is understanding that perfection isn't the goal—texture and fullness are. I spent way too much time watching tutorial videos thinking my roses had to look museum-quality, when really what makes them beautiful is that they look homemade and intentional. Start with the bigger roses in focal spots like the corners, then fill in the gaps with smaller buds and leaves so you never see bare frosting peeking through. If you mess up a rose, just pipe a leaf over it or add another bud nearby—nobody's counting individual flowers, they're just seeing the overall effect from across the room.
Timing and Storage Secrets
I learned the hard way that baking the cake the night before actually works in your favor because it gives you all your energy for the decorating part, which is where the real magic happens. The cake firms up in the fridge overnight and is actually easier to frost because it's less crumbly. Store finished cake covered at room temperature for up to two days if your kitchen isn't too warm, or move it to the fridge if you're decorating more than six hours in advance—the frosting actually sets up nicer when it's cold.
Variations That Still Feel Celebration-Worthy
If vanilla feels too simple or you're feeding people with particular tastes, there are easy swaps that don't complicate the process. A chocolate variation works beautifully—just replace three-quarters cup of flour with unsweetened cocoa powder and add an extra tablespoon of vanilla to brighten the chocolate flavor. You can also do flavored buttercream by replacing the milk with almond extract or a tablespoon of lemon zest mixed into the frosting, and you'd pair that with pretty pastel colors instead of the traditional rose hues.
- Chocolate cake with burgundy and gold roses feels sophisticated and grown-up for a college graduation.
- Lemon cake with white, yellow, and cream-colored roses has a bright, spring-forward energy that works for any season.
- Keep gel coloring on hand so you can match school colors or personal preferences without needing a whole new recipe.
 Pin it
 This cake has a way of making ordinary moments feel special, whether you're serving it at an actual graduation party or surprising someone with a homemade celebration. The vanilla and buttercream taste like joy tastes, if that makes sense, and the roses give you permission to feel proud of something you made with your own hands.
Recipe FAQs
- → What flour type is best for this cake?
Use all-purpose flour for a balanced texture and crumb that's moist yet sturdy enough to hold the buttercream decorations.
- → How can I make the buttercream roses vibrant?
Gel food coloring is recommended to achieve bright, non-runny colors for the roses and leaves.
- → What is the best way to ensure the cake remains moist?
Alternate adding the flour mixture and milk carefully, mixing just until combined, and avoid overbaking by testing with a toothpick.
- → Can I prepare the buttercream ahead of time?
Yes, buttercream can be made in advance and stored covered at room temperature for a day or refrigerated for longer storage before decorating.
- → How do I substitute for a chocolate variation?
Replace ¾ cup of flour with ¾ cup of unsweetened cocoa powder for a rich chocolate flavor.